I will be teaching adults tonight at the Dona Ana Arts Council "Art-Rageous" program. Our subject will be a lovely scene from the Bosque Del Apache Wildlife Refuge. It is a Make and Take Art Project evening with fun and refreshments.
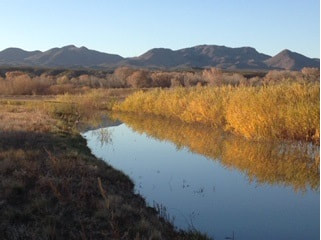
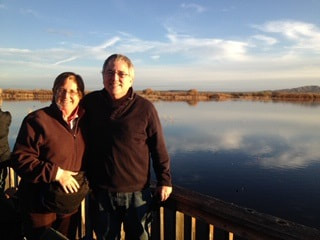
This is my reference photo.
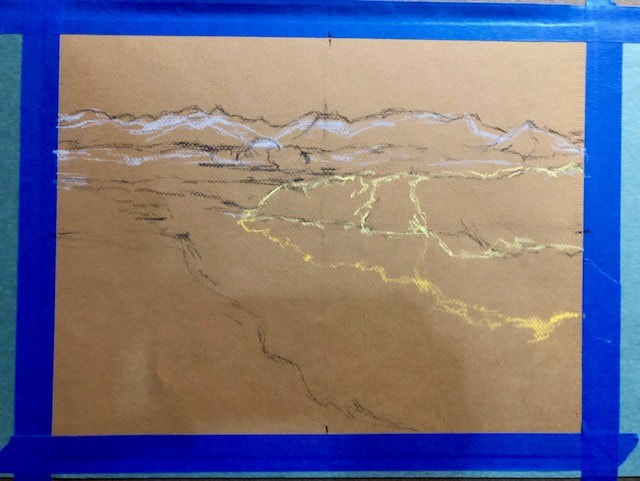
Step One: Sketching in the Landscape Contour Lines while organizing the compositional shape spaces.
I am working on toned Mi-Tientes pastel paper. I utilized an inexpensive set of the "Master's Touch Pastels" . The paper size is 11" x 14" taped to a masonite board with paper padding underneath the pastel paper. I worked with a reference photograph and marked middle of the edges coordinates on the top, bottom and sides of the photo reference and the pastel paper to act as proportional guideline references for placement of the horizon line and interior contour lines of the main landscape forms.
I am working on toned Mi-Tientes pastel paper. I utilized an inexpensive set of the "Master's Touch Pastels" . The paper size is 11" x 14" taped to a masonite board with paper padding underneath the pastel paper. I worked with a reference photograph and marked middle of the edges coordinates on the top, bottom and sides of the photo reference and the pastel paper to act as proportional guideline references for placement of the horizon line and interior contour lines of the main landscape forms.
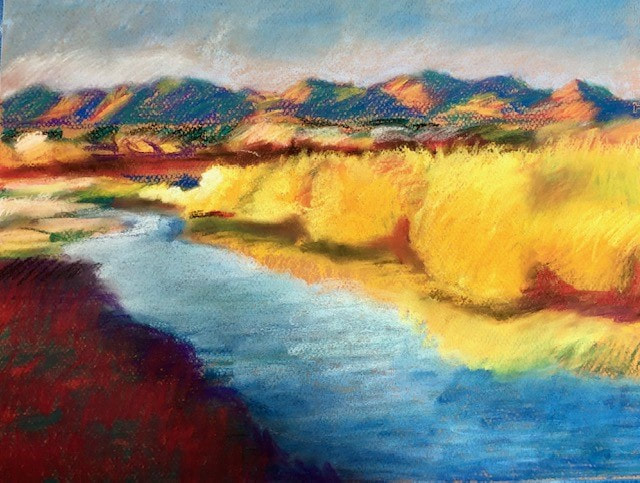
Step Two: Laying in the Color Scheme Masses and Shapes while indicating Values. I always try to do this step quickly to set up color relationships to see how the colors will interact with one another. I always begin with the sky and work from the background through the middle ground to the foreground. I look for the darker and middle tone rich hues or colors and their values "beneath the surface" of the color to build up layers of pastel from generally darker value to lighter values and tones.
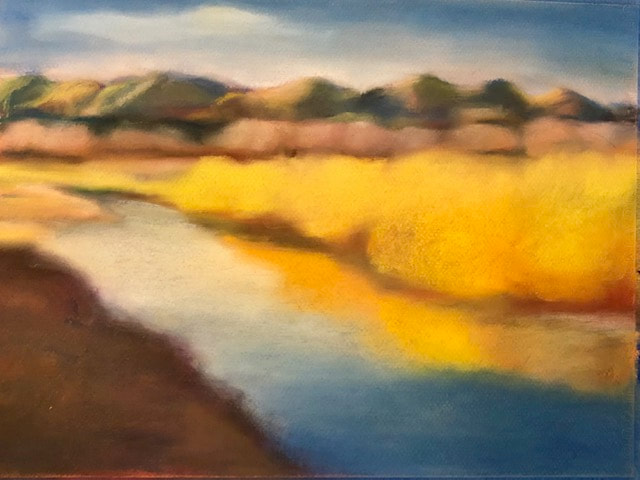
Step 3: Final Stages: I always wonder or reflect on whether or not I "went too far" with my blending technique which tends to be my style.
I will probably spray a fixative onto the pastel, and then go back into the pastel painting with pastel pencils to redefine some textures and light and shadow passages. This total process took about 90 minutes.
I will probably spray a fixative onto the pastel, and then go back into the pastel painting with pastel pencils to redefine some textures and light and shadow passages. This total process took about 90 minutes.
Reflection: I found the "Master's Touch Pastel Set" quite limiting as far as my color choices for this painting. It was a 12 color set. It was challenging to use this limited Pastel Palette. This is the similar pastel palette my students will have to work with in this make and take workshop. I am sort of "flying blindly" as I do not know my students' skill sets nor background knowledge or experience in working with pastels. However, I look forward to meeting them all this evening and having some great Art Fun!
 RSS Feed
